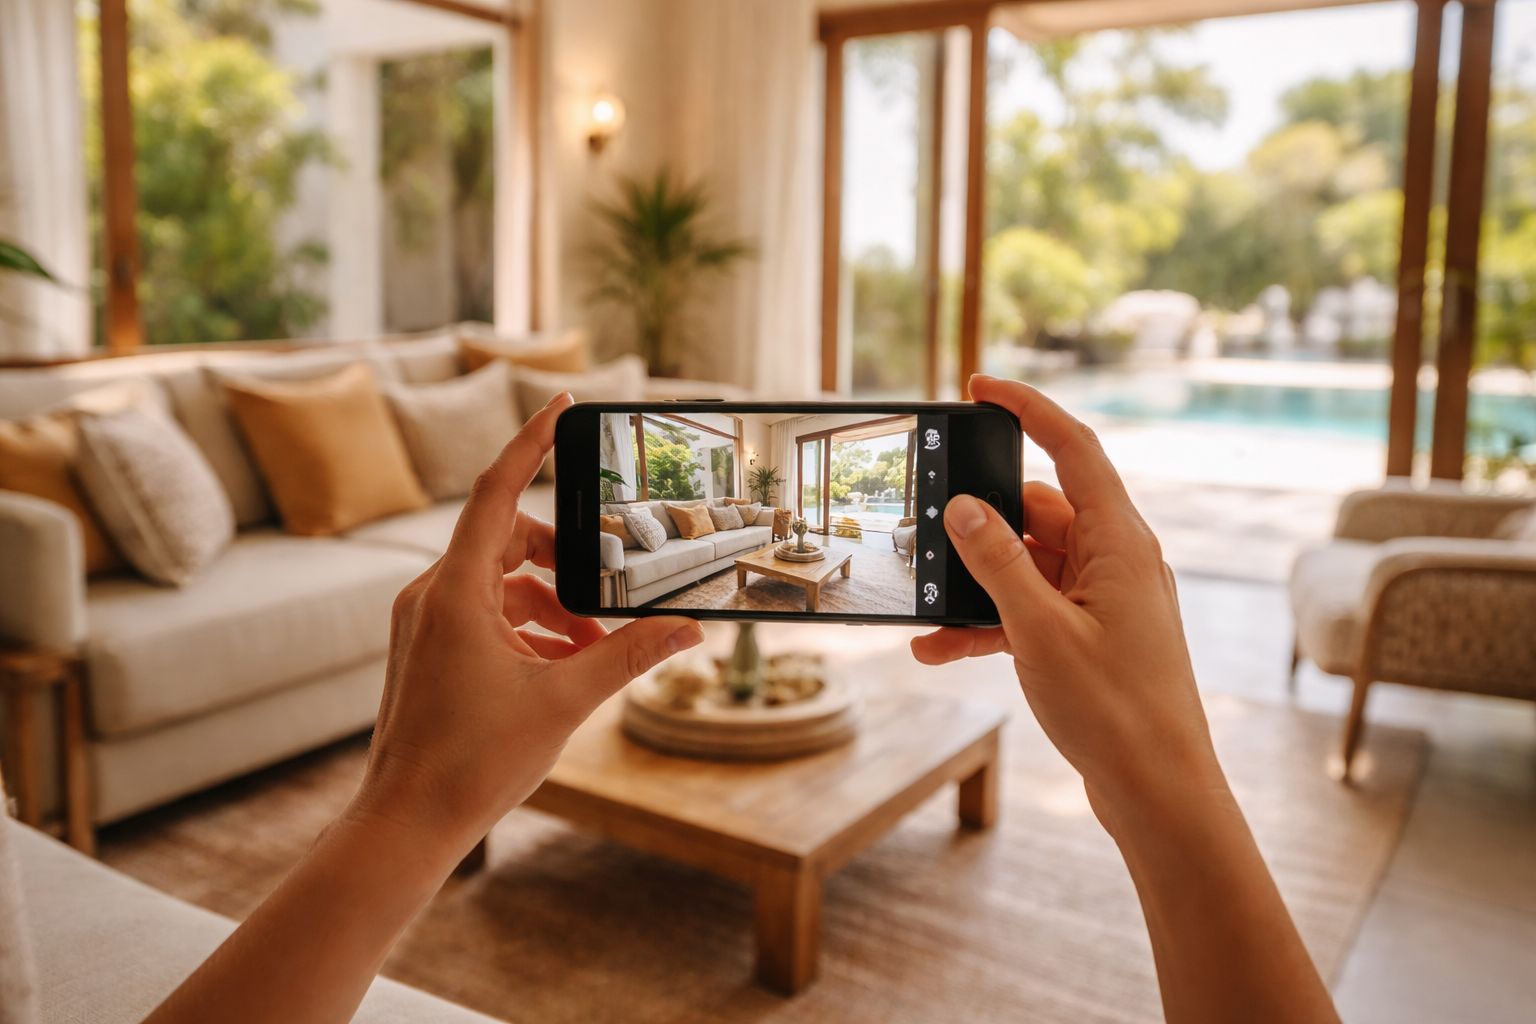
How to Shoot Your Homestay or Villa With Just a Smartphone (No Gear Needed)
How to shoot homestay smartphone photography effectively has very little to do with owning a DSLR. What really moves the needle is light, clean angles, and a reliable shot list that helps guests “get” your space at a glance. If you run a homestay or villa, your photos directly influence conversions on Airbnb, Booking.com, and your own website—because most guests decide in a few seconds whether your place feels right.
This is a simple, no-gear system you can reuse anytime—monthly, after a refresh, or when you add something new. It’s built for operators: quick to execute, easy to repeat, and optimized for listings, Google Business Profile, and social content.
The quick answer (what actually matters in smartphone photography for stays)
If you only keep a few things in mind, make it these:
- Control the light you have: open curtains, switch on lamps, and shoot when the room looks its brightest (usually morning for east-facing rooms, late afternoon for west-facing).
- Keep verticals straight: walls, windows, and door frames should look upright. This alone elevates how “premium” your space feels.
- Shoot from chest height: around 1.2–1.4 m (4–4.5 ft). It feels natural and keeps rooms looking spacious without distortion.
- Show the layout clearly: don’t just focus on decor. Your first 10 photos should explain how the space flows.
- Edit lightly and consistently: aim for bright, clean, and true-to-life. Over-editing breaks trust.
Operator insight: Slightly imperfect but honest photos often outperform overly stylized ones that feel disconnected from reality. Trust converts.
What “good” photos need to do for a homestay or villa
- Reduce uncertainty: What’s included? How big is it? Is it clean and private?
- Signal quality: Good lighting, straight lines, and tidy spaces instantly communicate professionalism.
- Sell the experience: think sunrise coffee spots, poolside evenings, reading corners—moments, not just rooms.
This is why villa content creation works best when it’s intentional. Think of your photos as a guided walkthrough, not a random collection.
Prep like an operator: the 20-minute setup that makes photos look expensive
Jumping straight into shooting is a mistake. Most “bad” photos come from poor prep, not poor cameras. This quick routine makes a huge difference:
Step 1: Reset the space (5 minutes per room)
- Hide bins, cleaning items, extra tissues, chargers, remotes, and clutter.
- Straighten curtains so they fall evenly.
- Align chairs, rugs, and bedside tables.
- Close toilet lids. Always.
- Wipe mirrors, taps, and glass surfaces.
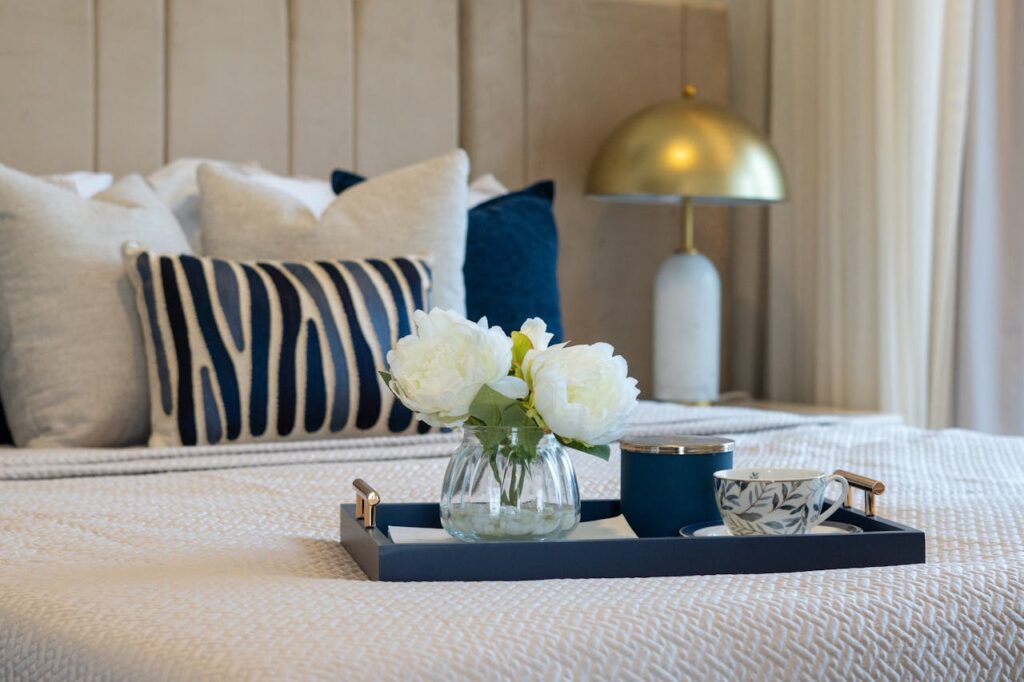
Step 2: Make the bed the “hero”
- Pull sheets tight and smooth wrinkles.
- Use at least 2 pillows; add 1 cushion if available.
- Add a simple touch—a folded throw, book, or tray. Keep it minimal.
Step 3: Add one “life” detail per key area
- Kitchen: a mug with a coffee jar.
- Bathroom: neatly folded towels.
- Balcony: two aligned chairs and a plant.
- Pool: a single towel on a lounger (only if spotless).
Common mistake: Over-staging. Guests should be able to picture themselves there without feeling like they’re stepping into a showroom.
Smartphone settings (keep it simple, avoid the traps)
You don’t need complicated settings—just consistency.
Use these defaults
- Lens: Stick with 1x for a natural look. Use 0.5x only for very tight spaces, and carefully.
- Grid: Turn on grid lines to keep shots straight.
- HDR: Keep it on or auto for better balance between bright windows and darker interiors.
- Flash: Keep it off. It creates harsh, unflattering light.
Focus + exposure (quick pro trick)
Tap your main subject (bed, sofa, table), then slightly lower exposure so bright areas near windows don’t blow out. Most phones let you adjust this with a simple slider.
Rule of thumb: Slightly darker is fixable. Blown highlights are not.
Best time of day to shoot (so your space looks bright without fake edits)
Lighting does most of the work—plan around it.
- Bedrooms + living rooms: aim for soft natural light (usually morning). Avoid harsh midday sun.
- Pool + exterior: early morning or golden hour works best.
- Bathrooms: use daylight plus lights. No window? Turn on all lights and hold steady.
- Overcast days: surprisingly great—soft, even light with fewer shadows.
Operator insight: Start with the brightest rooms first. As light shifts, the overall look of your listing changes.
Room-by-room shot list (the SOP that keeps your listing consistent)
This checklist keeps your photos structured and effective. Aim for 25–40 photos for a villa, or 15–25 for a private room.
Exterior + arrival (3–6 shots)
- Front approach or gate
- Main facade (straight-on)
- Entrance door (clean, welcoming)
- Parking (if relevant)
- Optional night shot with warm lighting
Living area (4–7 shots)
- Wide corner shot with seating and windows
- Opposite angle (TV, feature wall)
- Detail (reading nook, decor)
- Open-plan flow shot if applicable
Bedroom(s) (5–9 shots per bedroom)
- Wide shot with bed and side table
- Storage/wardrobe angle
- Window or balcony access
- Detail (linens, lighting)
- Ensuite access (if applicable)
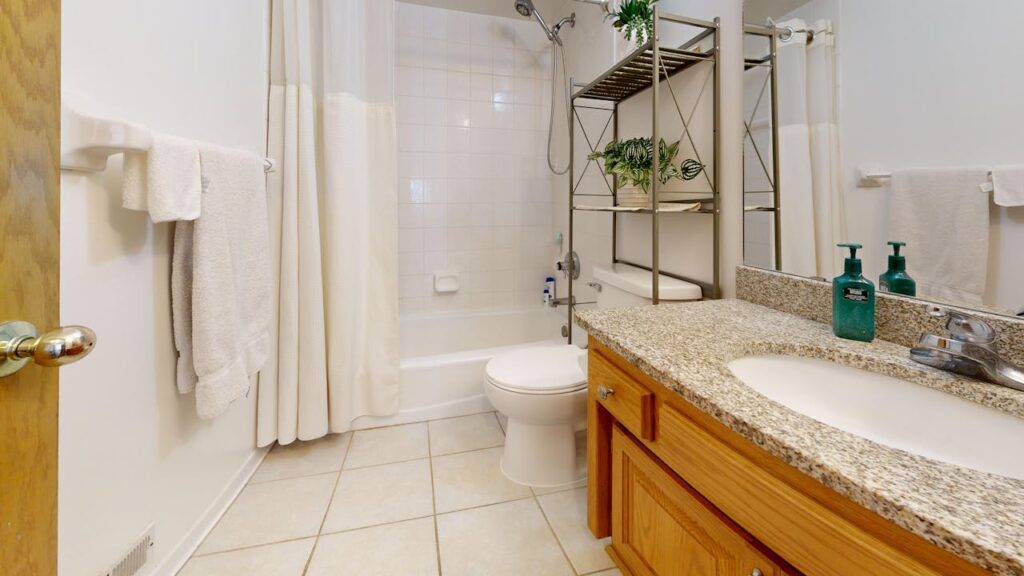
Bathroom(s) (3–6 shots)
- Wide sink + mirror shot
- Shower/bath area
- Towel + amenities detail
Kitchen + dining (4–7 shots)
- Wide kitchen view
- Dining table showing seating
- Coffee/tea station
- Cookware setup if provided
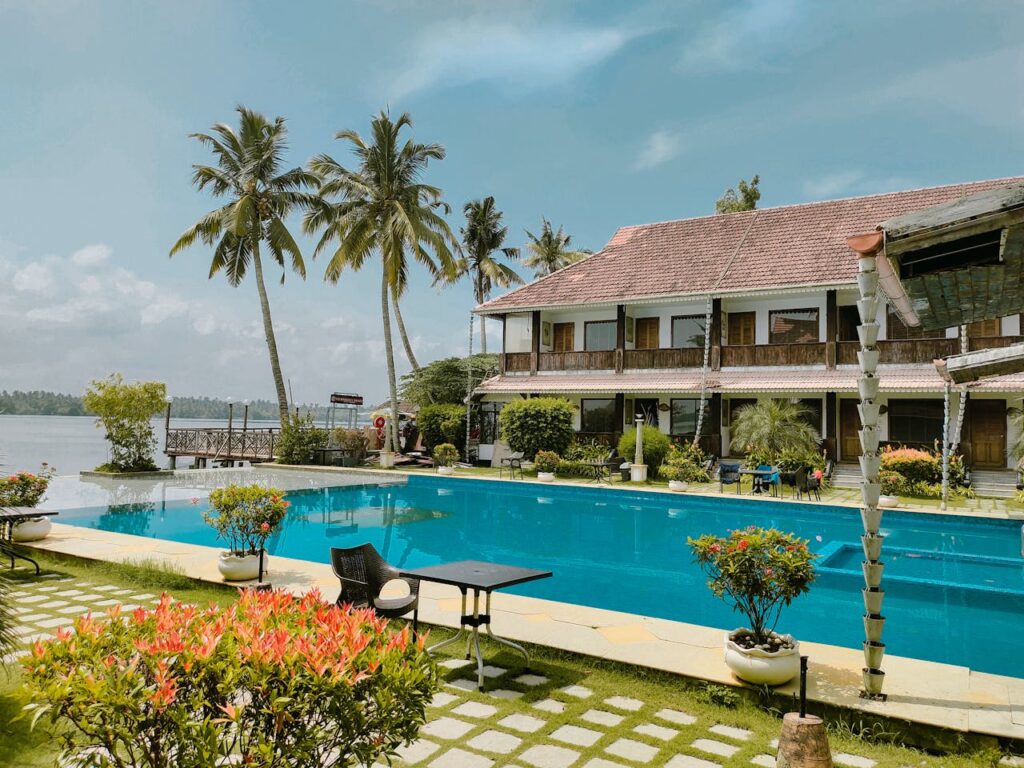
Outdoor experience (5–10 shots)
- Pool (wide + detail)
- Garden or patio
- View (timed for best visibility)
- Outdoor features (BBQ, shower, firepit)
- One lifestyle “moment” shot
Airbnb photography tip: Your first 5–8 images should do the heavy lifting—best bedroom, living area, pool/view, exterior, and layout clarity.
How to frame each shot (so rooms look bigger without lying)
Use corners, but don’t rely on ultra-wide
Corners help show more space, but ultra-wide lenses can warp lines. Start with 1x. If you use 0.5x, keep the phone level and step back slightly.
Keep the phone level
Tilt creates “falling walls.” Stay level and adjust your position instead.
Show pathways
Guests want to understand movement—how they’ll walk through the space. Include doorways and layout flow.
Show capacity clearly
If you say “sleeps 6,” make that visible—beds, sofa beds, dining seats.
A simple editing routine (fast, consistent, and trust-building)
Aim for bright, clean, and accurate images.
Edit in this order
- Straighten
- Crop
- Adjust brightness/shadows
- Reduce highlights
- Fix white balance
Consistency tip
Pick one or two reference photos and match everything else to that look. Mixed tones make your listing feel inconsistent.
Keep it real: Don’t remove real-world elements or mislead with edits. Accuracy builds trust.
Photo order for OTAs and direct bookings (a conversion-first sequence)
Ordering your photos strategically makes a difference.
| Position | What to place here | Why it works |
|---|---|---|
| 1 | Best “hero” image (bedroom or pool/view) | Grabs attention and drives clicks |
| 2–4 | Living area + strong angle + exterior | Builds immediate confidence |
| 5–8 | Second bedroom / ensuite / kitchen | Clarifies what’s included |
| 9–15 | Remaining rooms and bathrooms | Creates a walkthrough feel |
| 16+ | Details and amenities | Handles practical concerns |
Direct booking tip: Add a few captions in your gallery to answer key questions (e.g., “Private plunge pool,” “Fast Wi-Fi,” “6-minute walk to beach”).
Smartphone video (optional, but powerful for WhatsApp and Instagram)
Photos do the heavy lifting, but short videos help close bookings—especially on WhatsApp.
3 quick clips to capture
- Entrance to living walkthrough
- Bedroom to bathroom walkthrough
- Outdoor highlight (pool or view)
Hold your phone with both hands, keep it steady, and move slowly.
Where this helps: A quick video often answers questions faster than messages.
Common mistakes that make your stay look cheaper than it is
- Shooting at night with poor lighting
- Too many close-ups before full-room shots
- Clutter at the edges
- Mixed lighting colors
- Overusing ultra-wide
- Heavy editing
A 60-minute smartphone shoot plan (for busy operators)
If time is tight, follow this:
0–10 minutes: Prep
- Open curtains, turn on lights
- Declutter and wipe surfaces
- Fix bed and towels
10–30 minutes: Core shots
- Main bedroom (2 angles + detail)
- Living area (2 angles)
- Exterior/pool (2 angles)
30–50 minutes: Supporting shots
- Kitchen + dining
- Bathroom
- Second bedroom
50–60 minutes: Amenities
- Workspace
- Parking/entrance
- One lifestyle shot
Operator insight: Updating just your top 8 photos regularly often performs better than doing a full shoot once a year.
Mini checklist: what to do before you upload to Airbnb or Booking.com
- Pick a strong hero image
- Ensure the first 10 photos explain the space
- Remove duplicates
- Check for clutter or trust issues
- Keep colors consistent
When you should still consider a pro shoot (even if smartphone is working)
Smartphones can go far, but a professional shoot still makes sense when:
- You’re launching a new property
- You’re targeting a higher price point
- Your space has complex architecture or lighting
- You need premium visuals for ads
Even then, keep using your phone for regular updates and ongoing content.
Final note: the “honest clarity” standard wins
The best-performing listings share one trait: what guests see is exactly what they get. That clarity builds trust, improves conversions, and reduces complaints.
If you want a simple system, refresh your hero image regularly, update your top 10 photos, and capture a few short videos each month. That’s enough to stay competitive—no fancy gear required.
If you’re also focusing on direct bookings, pair strong photos with a smooth inquiry experience.